Create Shape - Smooth
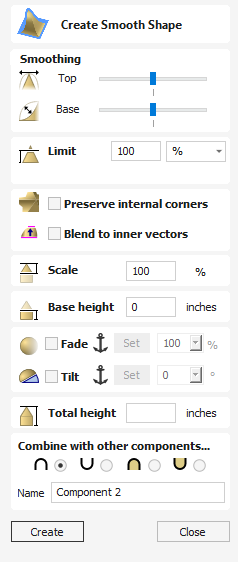
The Create Smooth Shape tool creates a 3D model component that has a smooth curve at the bottom and top of the model creating an S shape.
Watch this video to see this in action:
 Smoothing
This determines how much of a curve the smoothing has on the top or bottom of the model.
You can use the slider bar to edit the angle of the curve used for the smoothing at the top and bottom of the model, having the slider bar closer to the minimum will create a more concave curve and the maximum will give a more convex curve.
Limit
This will limit the height of the shape created. This can be entered in as a value or you can use the slider bar in the drop down menu.
Preserve Internal Corners
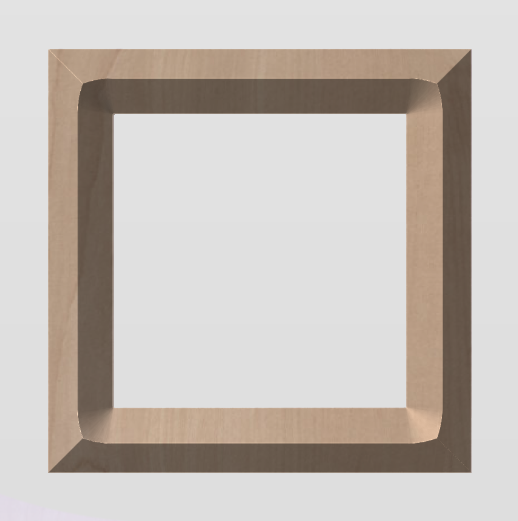
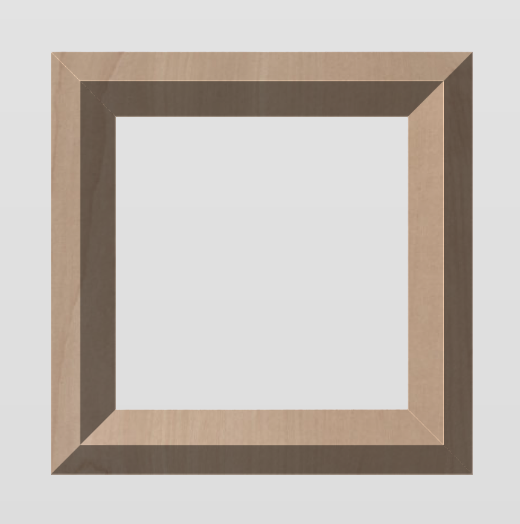
When creating a shape using both external and internal vectors, the resulting component will have both external and internal corners. In this scenario, with this option unchecked the internal sides of the resulting shape would curve into the centre line at which the two sides meet if you draw a straight line from the top peak of the corner to the base of the shape, creating rounded internal corners.
Enabling this option by checking the box will mean that these internal sides will be comprised of a completely straight sided skeleton until both sides converge at the centre line of the corner, creating a defined sharp crease and an internal corner which will come to a sharp point as if the corners have been perfectly mitred.
Note
A good way to visualise the effect of this is to imagine looking at a corner of a building where two separate wings with pitched roofs meet, you’d expect to see a straight faced slope rather than a bowed slopein the corner from the ridge to the eaves. With this option deselected the slope would be pinched and curved inwards towards a single point in the corner.
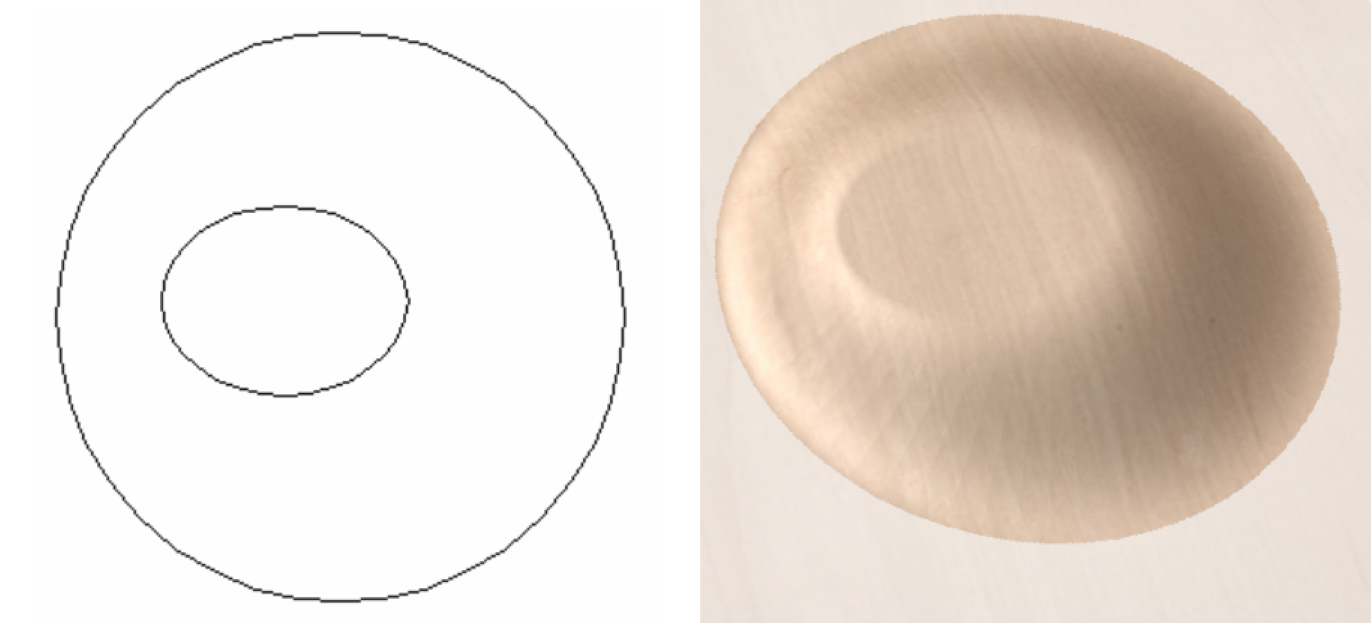
This is best demonstrated with examples that use a polygonal base vectors;
Blend To Inner Vectors
This option applies the selected profile across the selected vectors. It blends to the profile from the outside of the vectors to the inner vectors
Scale
This limits the height of the shape by scaling the shape up or down while retaining its general specified profile. It is scaled to the height entered in the Height area of the form which becomes available once this option is selected. The slider can also be used to change the final height.
Base Height
Specifies the height of a flat 'base plane' added below the profile you have chosen.
Fade
When this option is checked ✓ the user can fade the Z depth of the Component. The first part of this operation (once the option is checked ✓) is to select the Set Anchor button - then click two points in the 3D view. The first click specifies the point which will remain at the current height. The second click specifies the point that the Component will be faded down toward. The shape will fade down from the first point to the second by the percentage selected.
Change the strength of the fade by clicking the down arrow next to the percentage value and using the slider to move this up and down or type in a specific value for the amount you would like to reduce the depth by. The fade will be applied linearly between the two selected points. This is a useful tool for giving the effect of a Component fading into the distance to help with overlapping areas of Components if you want to lower an area to give it the appearance of going behind another one.
Tilt
When this option is checked ✓ the user can set a direction and angle to tilt the shape up at an angle in Z. The first part of this operation (once the option is checked ✓) is to press the Set Anchor button - then click two points in the 3D view.
The first click specifies the point which will remain at zero (the pivot point of the tilt).
The second click specifies the point that will be tilted upwards by the specified angle (the point that will be raised up).
The angle can be edited by clicking the arrow next to the value and using the slider or by typing in a specific value and hitting the Space Bar on the keyboard to apply the angle.
Total Height
This is the Total height of the model and this will change when editing the Profile, Limit, Scale or Base Height options.
If you edit the height this will also edit the value in the Scale and Base Height section to create the shape at the correct height entered.
Combine with other component
This section includes options to allow you to name your Component and control the way it will be combined with other objects in the Component Tree.